
If you like to monitor your PC’s performance while you work or play, the following solution should interest you. Indeed, on Windows 11, you now have the possibility to add widgets that allow you to monitor the use of the processor (CPU), the graphics card (GPU), the random access memory (RAM), and your Internet network. In this article, we’ll show you how to install and configure them so you can monitor your computer’s performance in real time. Follow the leader!
Add CPU, GPU, RAM, and Network Widgets on Windows 11. Recently, Microsoft rolled out an open-source application dubbed Dev Home. As the name suggests, this application is primarily intended for developers, but anyone can install it. It is a control center that allows developers to watch all their projects through customizable widgets. Among the widgets available, you have, in particular, those that allow you to monitor the performance of your PC, namely the CPU, the GPU, the RAM, and the network.
This app is beneficial because the widgets are not limited to the app itself. You have the option of integrating them into the Windows 11 widgets panel, accessible via the icon located at the bottom left of the taskbar. So you can have direct access to your favorite widgets without even opening the app. Here’s how.
Install the Dev Home application.
- Download the Dev Home app from the Microsoft Store. To do this, click on “Get App from Store.”

- Download the Dev Home app.
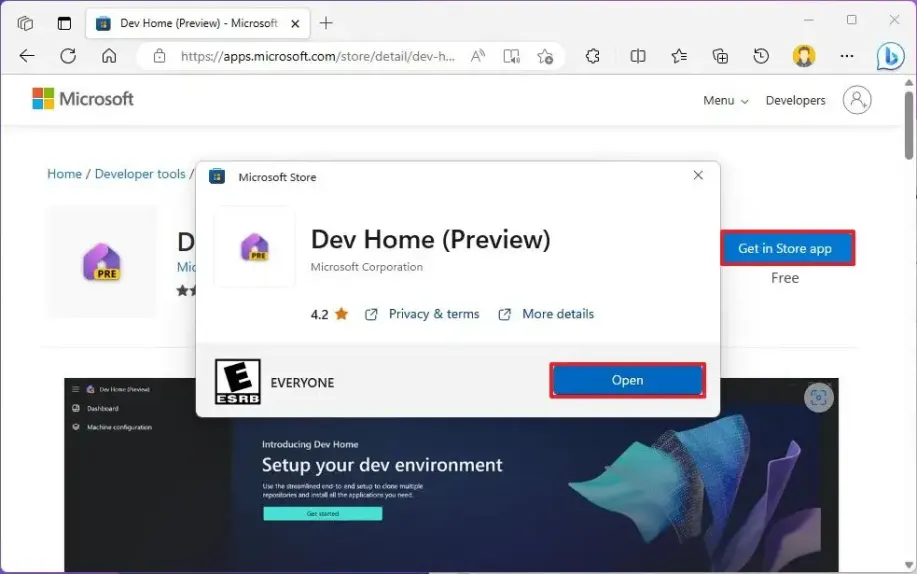
- Then, proceed to install the application by clicking on the “Get” button.
Now that the application is installed, you can add the widgets that interest you from the Windows 11 Widgets panel.
Add system monitor widgets.
- Open the widgets panel on your Windows 11 PC. To do this, click the icon at the bottom left of the taskbar or use the keyboard shortcut Windows + W.
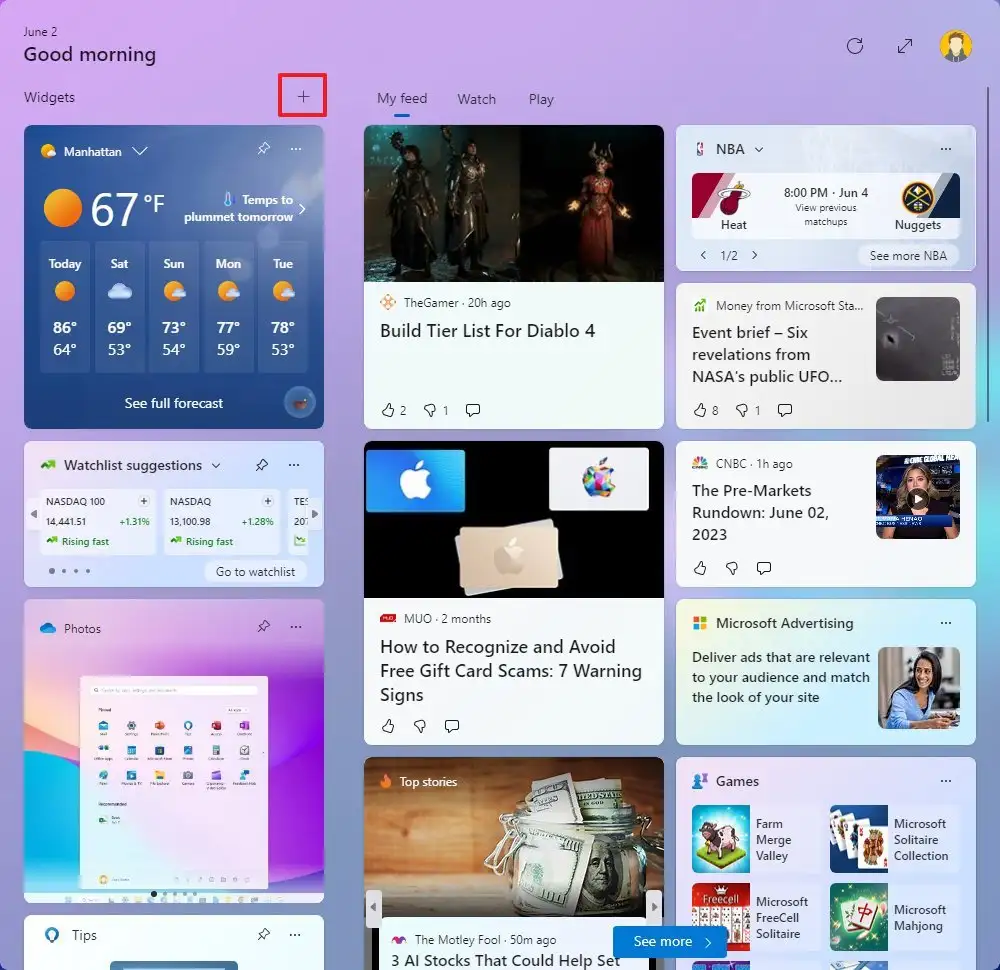
- At the top of the widgets panel, click the “Add widgets (+)” icon.
Add Widgets on Windows 11
- Select widgets to add to the panel, such as CPU, GPU, Memory, and Network.
- Add performance monitoring widgets (CPU, GPU, RAM, and network) on Windows 11.
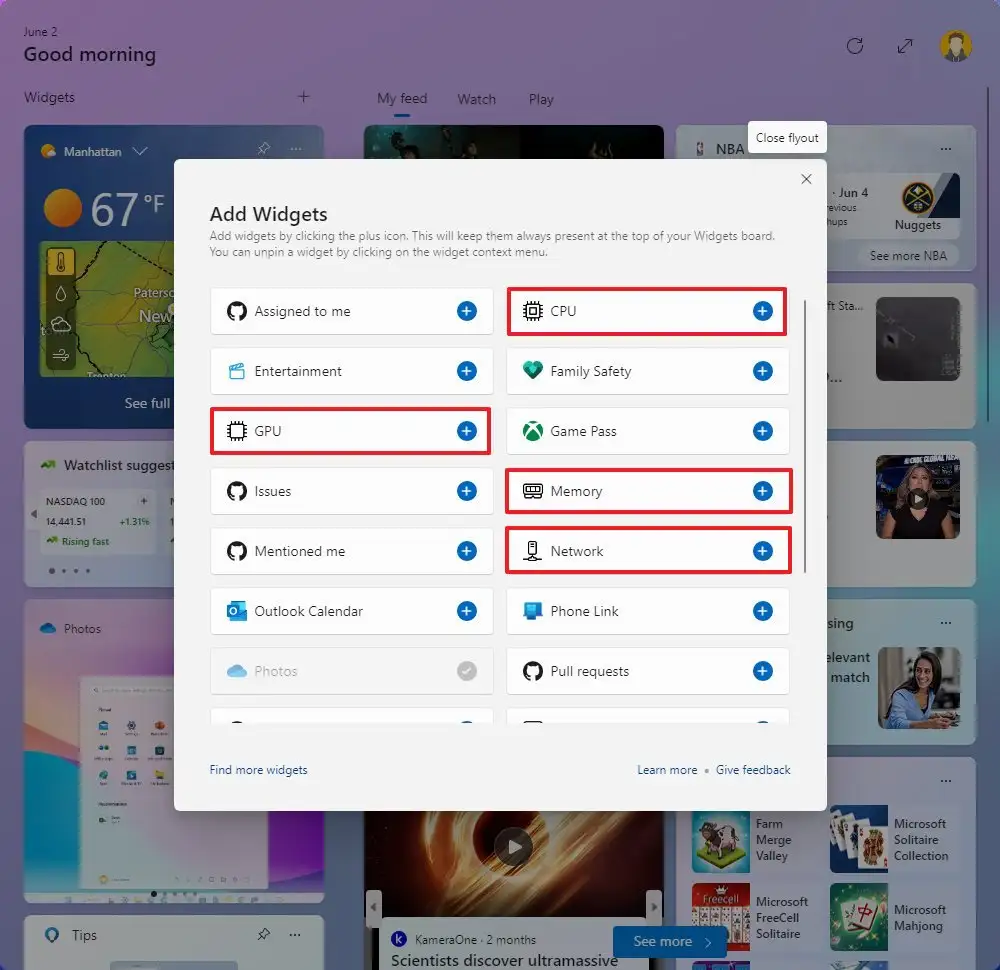
- Place the widgets in the locations of your choice in the panel. You can also change their size (small, medium, or large).
✅ That’s it! Your widgets are now in place! Whenever you want to monitor the performance of your Windows 11 PC, all you have to do is click on the widgets icon on the taskbar.
"Because of the Google update, I, like many other blogs, lost a lot of traffic."
Join the Newsletter
Please, subscribe to get our latest content by email.